
PyQt is a set of Python bindings that allow programmers to create highly customized graphical user interfaces (GUIs) in the Python programming language. PyQt is based on the C++ Qt library, which is used to create graphical user interfaces for a wide range of multi-platform applications.
Depending on the level of customization necessary, PyQt widgets can be produced in a variety of methods. Qt Designer is a Qt utility that allows you to create and construct graphical user interfaces using a what-you-see-is-what-you-get editor. The developer can swiftly iterate on ideas while viewing immediate feedback when creating widgets with this user-friendly application. This post will walk you through the steps of creating a PyQt widget with Qt Designer and Python.
Example steps to build your first GUI using Qt-
1. Install PyQt
If PyQt hasn’t already been installed, the first step is to do so. Homebrew or pip can be used to install PyQt on MacOS
Homebrew install:
> brew install pyqt5
Pyqt5 designer should be installed automatically if you install with homebrew.
Pip install:
> pip install pyqt5
# Install the developer tools
> pip install pyqt5-tools
2. Create the UI in Qt Designer
The next step is to open Qt Designer. Qt designer may be launched on Mac OS by typing the following into the terminal:
> open -a Designer
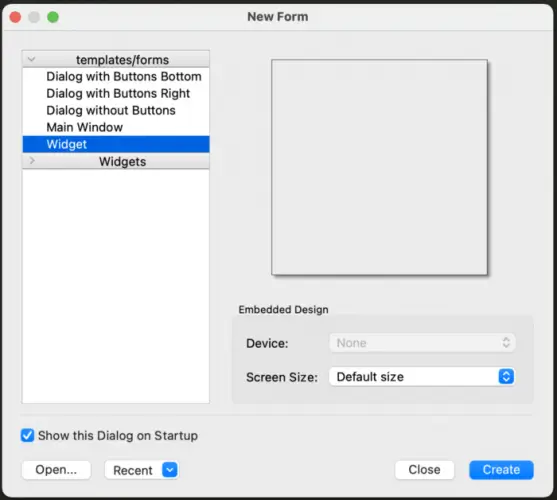
Create a Qt Widget
File -> New -> Widget
Widgets can be dragged from the widget box to the form from here, and the properties of each widget can be modified as needed. To view the available widgets, go to View -> Widget Box. The widgets in the demo.ui sample below are of the types QHboxLayout, QPushButton, QLabel, QSpinBox, QLineEdit, and others.
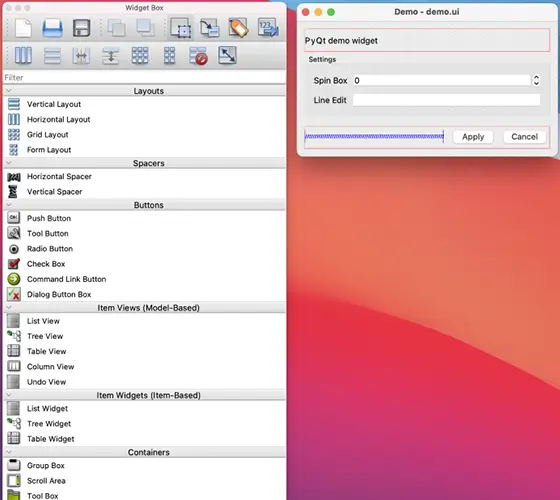
Once the layout is finished, remember to save the.ui file.
3.Initialize the Qt Widget in python
To load and initialise the Qt Widget generated in Qt Designer, a QWidget class must be constructed in Python. The bare minimum of code required to launch the main widget is listed below. Launch QWidget from Python.
4. Connect UI Components to the Code
We’ll most likely need to interact directly with the components to establish default values or query values from input fields now that the main widget has been initialised from the python class.
An identification name is required for each component that will be accessed from the Python code. Go to View -> Property Editor in Qt Designer to access the property editor. Modify the objectName field for each widget component to change the name. This name will be used to refer to the relevant widget in the Python code.

The name mainLabel has been allocated to the QLabel in the example above. The text of the label can now be changed in the code by calling the following function:
self.mainLabel.setText(“Updated Text”)
5. Connect UI Actions to Code
The application will most likely need to respond when a user interacts with a widget component. Qt’s callback mechanism is built around signals and slots. When an event occurs, UI signals are emitted. In response to a particular signal, a slot, which is expressed as a function, will be called. A UI action and a custom function can be linked in two ways.
Option 1: Connect a function to a signal
When you click the QPushButton applyButton, the function self.click will be called.
self.applyButton.clicked.connect(self.click)
Option 2: Specify the slot using the pyqtSlot decorator
The pyqtSlot decorator can be used to indicate the slot for a specific signal.
@pyqtSlot(name=”on_applyButton_clicked”)
def click(self):
print(“CLICKING”)
Conclusion
Qt Designer is very efficient tool to quickly establish the framework for any UI, but the possibilities with Qt are not restricted to what’s available through Qt Designer. PyQt has a robust API framework that allows developers to change the look and feel of the application. The options are infinite!
Reach out to info@oditeksolutions.com for more information on our capabilities on Qt.