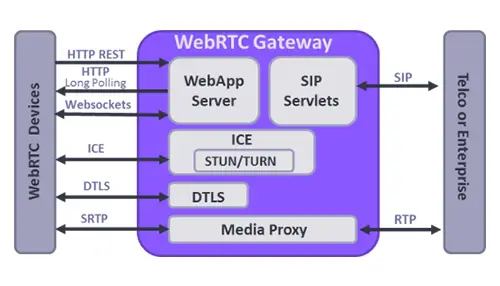
A Voice over Internet Protocol (VoIP) is used to make and receive phone calls using an Internet connection instead of the device’s cellular service.
From iOS 8, VoIP apps need to maintain a persistent connection with the server to receive calls using Internet connection. Keeping a connection open in the background, drains the battery as well as causes all kinds of problems when the app crashes or is terminated by the user.
With iOS 8 Apple introduced PushKit, it improved battery life, performance and stability of messaging apps. PushKit can solve these problems by offering a high-priority push notification with a large payload. The VoIP app lets users receive the VoIP push notification in the background, sets up the connection or process dat,a and displays a local notification to the user. When the user swipes the notification, the call/data is ready to connect/display.
Why do we need PushKit?
If you are making a VoIP application, then you definitely want to update your application in the background state as well as wake your application when any VoIP call is being received.
We cannot achieve this by using APNs because iOS Push Notification will not wake up the app when the application is in the terminated state.
There are a couple of benefits of PushKit-
1. PushKit notifications are never presented to the user (Silent Notification) — they don’t present badges, alerts, or sounds.
2. Apple promises to deliver the iOS push notifications with high priority.
3. For Voice over Internet Protocol (VoIP) push notifications, the maximum payload size is 5 KB (5120 bytes).
4. Your device is woken only when VoIP pushes occur, saving energy.
5. VoIP push can include more data than what is provided with standard push notifications.
6. If your app is not running when a VoIP push is received then your app is automatically relaunched.
7. Your app is given a runtime to process the push, even if it is operating in the background.
Enable Voice over IP in your project
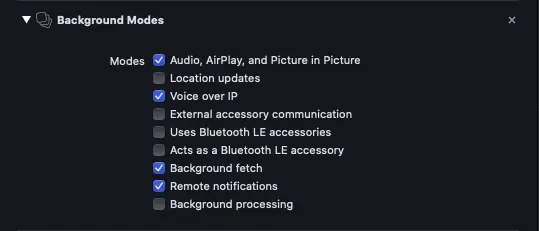
Xcode Project > Capabilities pane. Select the checkbox in Background modes for Voice over IP, as per the image shown above.
Prepare to Receive VoIP Push Notifications
You must also create a certificate for your VoIP app. Each VoIP app requires its own individual VoIP Services certificate, mapped to a unique App ID. This certificate allows your notification server to connect to the VoIP service.
Visit the Apple Developer https://developer.apple.com/certificates and create a new VoIP Services Certificate.
However, push certificates can be re-used for development and production both. See the image below to know.
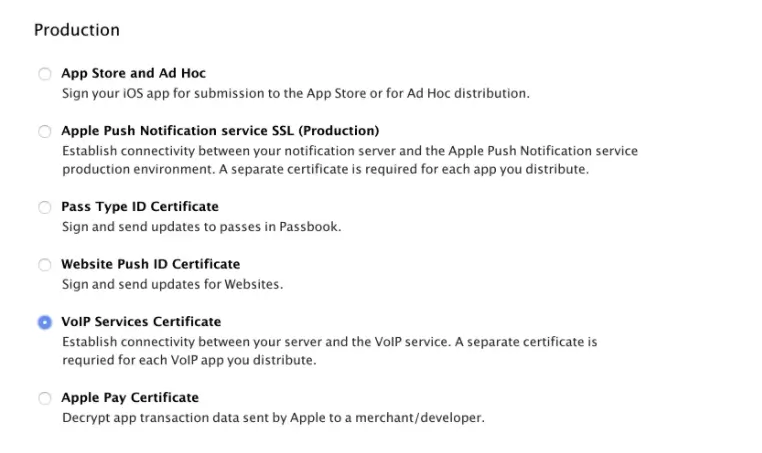
After doing that import the VoIP Push Certificate into Keychain Access and export it as a .p12 file.
Create an iOS app and upload the VoIP push certificate for both Production and Development environments.
Enable push notification.
Download the certificate and import it into the Keychain Access app.
Then export certificate for creating .pem file
Create .pem file from an exported certificate.
Now, navigate to the folder where you exported this file and execute following command:
openssl pkcs12 -in YOUR_CERTIFICATES.p12 -out VOIP.pem -nodes -clcerts
Configure VoIP Push Notifications in Xcode project (Swift)
To configure your app to receive VoIP push notifications, link to the PushKit framework in your app delegate (or some other location in your app), and after that we have to create a PKPushRegistry object and set its delegate to self, and register to receive VoIP pushes.
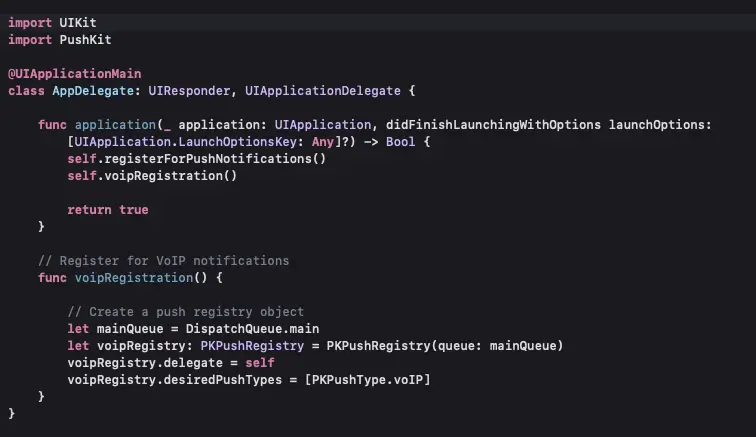
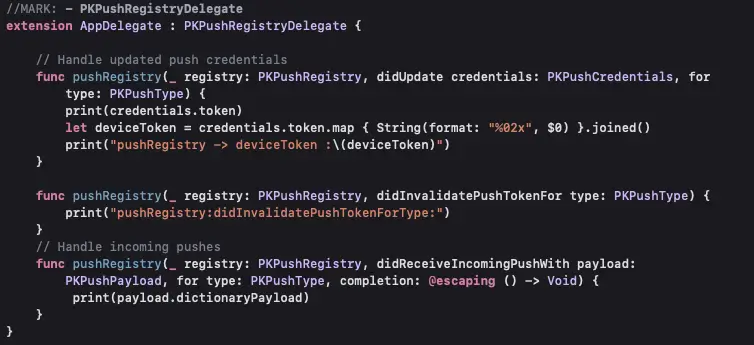
Now, implement a delegate method that can handle updated push credentials. If your app receives both standard push notifications and VoIP pushes, then your app will receive two separate push tokens. Both tokens must be passed to the server in order to receive notifications.
Finally, set up a delegate method to process pushes. If your app isn’t running when the push is received, your app will be launched automatically.
Test:
You can test VoIP notification by using the following code in terminal:
curl -v -d ‘{“aps”:{“caller”:”Caller Name”}}’ –http2 –cert VOIP.pem:password https://api.development.push.apple.com/3/device/voip_device_token
Note:
On iOS 13.0 and later, incoming Voice over IP calls must be reported when they are received and that also before the didReceiceIncomingPush() method finishes execution, otherwise the system will terminate your app.
Repeatedly failing to report calls may prevent your app from receiving any more incoming call notifications.
Basically what that means is, you shall not use VoIP pushes for non-VoIP messaging, and shall use regular push notifications for that.


